
In this guide, I’ll show you step by step how to get a good crust on a steak using just a pan and a stovetop (without getting overly technical). I’m using an outside skirt steak about 3/4 inch (1.9 cm) thick as an example. Why such a thin steak? Because if these tips work on a cut this thin, they’ll work even better on thicker ones.
Why is it easier to get great results with thicker steaks? Simple, they take longer to cook. That gives you more time to brown the surface before the inside overcooks. And that’s exactly what makes it easier to build a really good crust.
Follow the steps below to get a perfect steak crust every time.
Step 1: Prepare the Steak
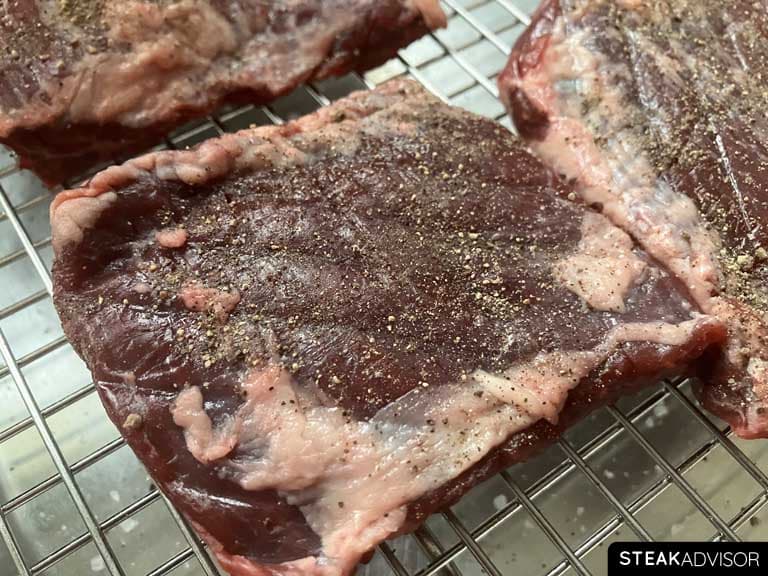
Pat the steak dry with paper towels to remove excess surface moisture (moisture is the biggest enemy of a good crust). Season both sides with kosher salt (about 1–1.5% of the steak’s weight). Place the salted steak uncovered on a wire rack set over a baking sheet, then let it rest based on how much time you have and the results you’re after:
- Best balance of crust, flavor, and minimal gray band: Leave the salted steak in the fridge for 4 to 6 hours. This is the sweet spot if you want the full benefits of dry brining (better flavor and a drier surface for a solid crust) without ending up with a thicker gray band under the crust (this is my go-to method).
- If you don’t have time: Let the salted steak rest at room temperature for 1 hour. That’s the minimum time needed for the salt to start improving the flavor and for the surface to dry enough to get a decent crust.
- For maximum flavor and crust: For the deepest flavor and the driest surface, leave the salted steak in the fridge for 12 to 24 hours. The crust will be amazing, and the salt will penetrate more deeply throughout the meat. The downside is a thicker gray band under the crust, which is simply a result of longer dry brining.
Regardless of which method you choose, take the steak out of the fridge about 30 minutes before cooking and let it sit at room temperature. This helps the steak cook more evenly, so don’t skip this step. I go into more detail on why this matters in my guide How Long to Leave Steak Out Before Cooking.
Note
Don’t salt a steak 2 to 30 minutes before cooking. That’s the worst time to do it if you want a good crust. If you really don’t have the time to salt it properly, it’s better to skip salting altogether and season the steak with salt after cooking.
Check out my full guide on How to Salt a Steak to learn more.

Step 2: Preheat the Pan
Place a cast-iron skillet (or a heavy-bottomed stainless steel or carbon steel pan) over medium-high heat and let it heat up for 3–4 minutes. Add 1–2 tablespoons of a high-smoke-point oil and let it heat for another minute. You want the pan to be very hot, around 450–500°F (232–260°C), for a hard sear.
While the pan heats up, pat the steak dry one more time and, if you like, season it with about 1/2 teaspoon of finely ground black pepper per pound (454 g) of steak. Then move on to the next step.
Note
For searing, go with an oil that won’t burn at high temperatures. Use a high-smoke-point oil, such as refined avocado oil, which has a smoke point of around 500°F (260°C) and a neutral flavor. If you don’t have it, take a look at the table below for alternatives.
| Type of Fat | Smoke Point ºF | Smoke Point ºC |
|---|---|---|
| Refined Avocado Oil | 520ºF | 270ºC |
| Refined Safflower Oil | 510ºF | 266ºC |
| Beef Tallow | 480ºF | 250ºC |
| Pecan Oil | 470ºF | 243ºC |
| Refined Peanut Oil | 450ºF | 232°C |
Step 3: Sear the Steak
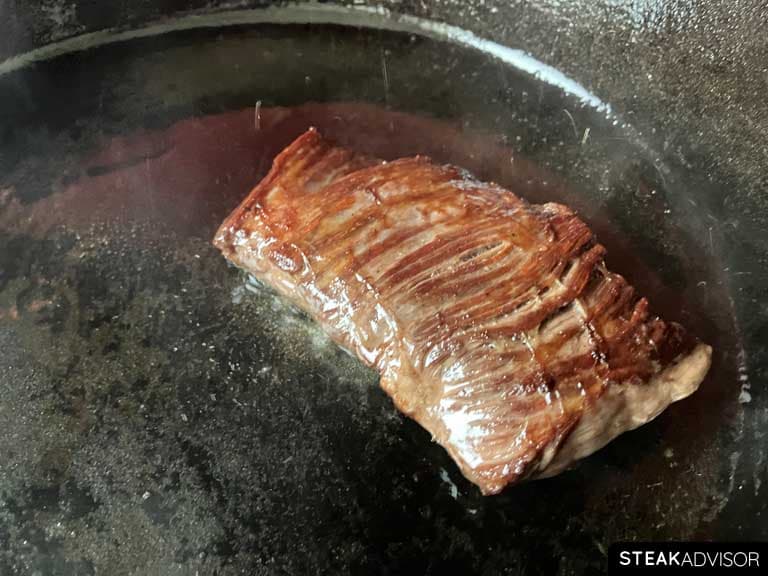
If your steak has a fat cap (like a strip steak or picanha), start by placing it fat-side down to render some of the fat. Let it sear for 60-90 seconds, until the fat looks nicely browned. Then flip the steak onto the meat side and start searing, flipping it every 30 seconds.
Keep flipping until the steak reaches 20°F (11°C) below your target doneness for steaks 1 to 1 1/2 inches (2.5 to 3.8 cm) thick, or about 15°F (8°C) below for steaks under 1 inch (2.5 cm) thick (see the steak doneness chart below). Then remove it from the pan and let it rest.
If your steak is 1/2 inch (1.25 cm) thick or thinner, use the searing method from that recipe instead.
| Steak Doneness | Internal Temp. (°F) | Internal Temp. (°C) |
| Blue Rare | 110-120°F | 43-49°C |
| Rare | 120-130°F | 49-54°C |
| Medium Rare | 130-140°F | 54-60°C |
| Medium | 140-150°F | 60-66°C |
| Medium Well | 150-160°F | 66-71°C |
| Well-Done | Over 160°F | Over 71°C |
Step 4: Enjoy a Perfect Crust on Steak
First, let the steak rest 5 minutes if it’s up to 1 inch (2.5 cm) thick, or 6–7 minutes for steaks about 1 1/2-inches (3.8 cm) thick. While it rests, don’t cover it with foil. Leave it uncovered, ideally on a wire rack, so the crust stays nice and crisp. After resting, slice it thinly (against the grain if needed) and serve.
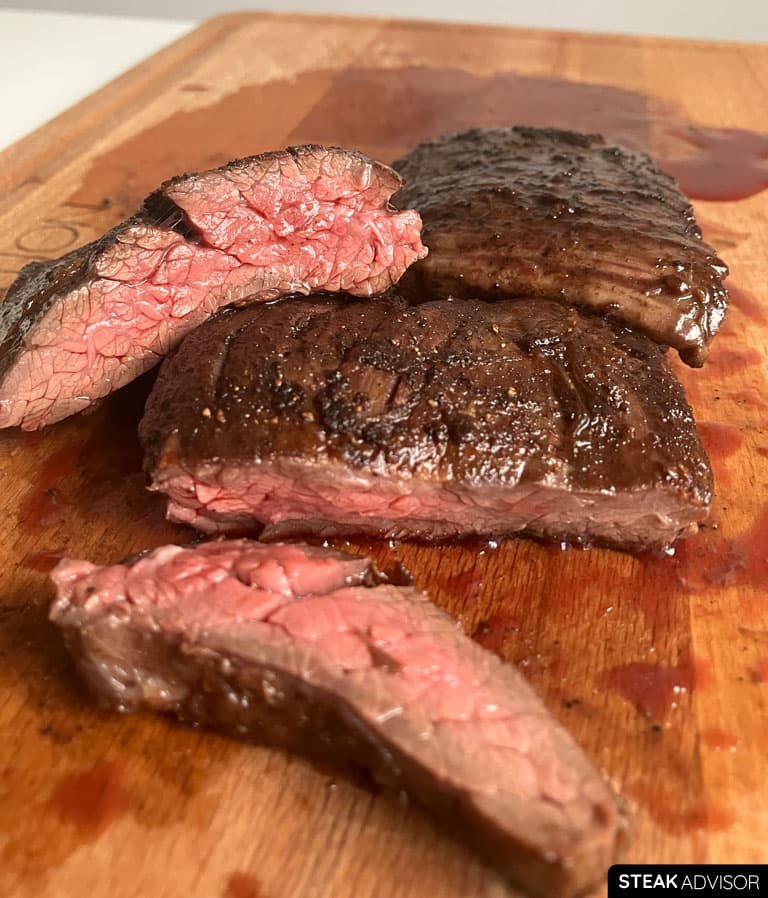
Slicing against the grain shortens the muscle fibers, which makes each bite easier to chew. Naturally tender cuts, like ribeye or filet mignon, slice them however you like. But cuts with a coarser grain (such as skirt steak, bavette steak, flank steak, or hanger steak) need to be sliced against the grain to keep every bite tender. Check the photo below for an example.

The Bottom Line
If you want to understand why these tips work so well, I break it all down in much more detail in my other article, How to Sear a Steak (Ultimate Guide for Any Cut & Technique).
Here, I’m just focusing on the absolute basics, the fundamentals that help you get a great crust without overcomplicating things, no matter what steak you’re cooking. If you want to get easily noticeable, better results, start with a thicker cut. A steak that’s about 1 to 1 1/2 inches (2.5–3.8 cm) thick is ideal. Thicker steaks give you more room for error and make it much easier to build a proper crust.
If you want to experiment a bit, like adding butter, garlic, and herbs, keep this in mind: skip butter basting steaks that are 1 inch (2.5 cm) or thinner. With cuts that thin, it’s very easy to overcook the steak while basting. Instead, a better option is to add a slice of compound butter on top after searing, or quickly prepare the garlic–butter–herb mixture in the pan while the steak rests. If you really want to butter-baste in the pan, do so only with steaks about 1 1/2 inches (3.8 cm) thick.

If you’re wondering whether butter basting is necessary to get a great crust, the answer is no. You don’t need it. Just follow the steps in this article, and you’ll get a solid, well-browned crust on a 1-inch (2.5 cm) thick steak every time.
Just look at the photo below for proof. That steak is a 3/4-inch (about 2 cm) thick skirt steak, seared exactly the way I describe here. Even though it’s a thin cut, it still developed a deep, flavorful crust on the outside and, more importantly, it stayed pink, tender, and juicy on the inside.

Is the “multiple flips” method somewhat new? I think I heard of it a couple of years ago – I guess it gives better coverage to all the nooks and crannies of the meat’s surface. Used to be “don’t touch it until you flip it!”
Hi Matt, thanks for the comment.
The “multiple flips” method isn’t entirely new, but yes, it seems to be gaining more widespread acceptance these days. Flipping the steak several times helps cook it more evenly inside (with less gray band) and makes the crust nice and crispy without burning one side too much.